I’m working every day with UICollectionViews and until recently never used a custom layout. I decided to take the plunge and learn how to create one when I had to deal with a complex layout on a UICollectionView and make my designer happy. So here is everything I learned (or everything you need to know — to start with) about custom layouts for UICollectionView.
Let’s imagine that you have a “complex” design to integrate in a UICollectionView. And yes, you need a collectionView. When I say complex, I mean different types of cells, some of them will have a fixed size, some others will be resized on the fly depending on their content.
You can always try to do things manually, it may work, but it may also take a (huge) lot of time and memory to get displayed on your device. So let’s see what a custom layout or UICollectionViewFlowLayout can do for us.
This tutorial will be split into two parts. In the first one, we will create the UICollectionView and cells that we are going to use in the second part where we will create the custom layout.
First, the collection view:
To cover most of the configurations you can encounter while working on a UICollectionView, let’s imagine 3 sections with 3 different layouts — have a look at the wireframe of the layout we want to achieve:
- section 1: a cell with fixed size
- section 2: a cell with a fixed width and a dynamic length
- section 3: multiple cells aligned on a grid, with fixed size
Then you can have fun and mix all that together. That’s up to you.
Now, let’s create the UICollectionView and the cells.
View Controller
Create a new file (Cocoa Class) subclass of UIViewController and call it MyCollectionView.
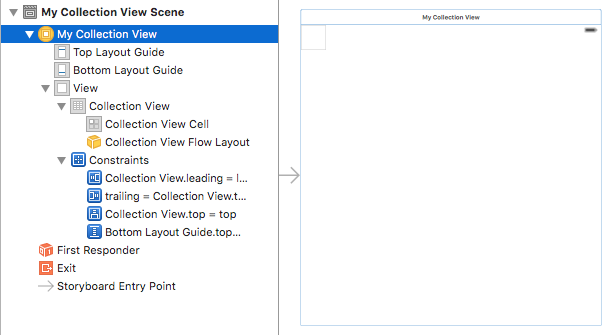
On the storyboard, add a UICollectionView, extend its size to match the view and add the missing constraints. Set the class to MyCollectionView.
Link the DataSource and Delegate to the MyCollectionView.
Here is the skeleton of our UICollectionView:
Note: you can also create a UICollectionViewController from the beginning and skip the rest. It’s up to you.
Section 1:
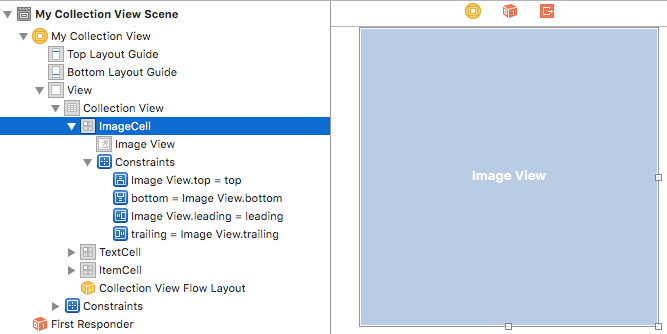
Create a new file, subclass of UICollectionViewCell and name it ImageCell.
Open the storyboard and in your UICollectionView, add a UICollectionViewCell (or use the default one), drag an UIImageView in the cell, expand it to match the cell edges, add missing constraints, and set the class to ImageCell.
In the class, create an imageView variable and connect it to the UIImageView in the Storyboard.
class ImageCell: UICollectionViewCell {

    @IBOutlet weak var imageView: UIImageView!

}
Easy!
Section 2:
Again, create UICollectionViewCell and name it TextCell.
Back to the storyboard, we will create the text cell. Please pay attention, it will be slightly more complicated (2 extra steps, how difficult!).
- Drag a
UIStackView, resize it and pin it with a small margin to the cell edges (Params: Axis = Vertical, Alignment = Fill, Distribution = Fill, Spacing = 8). I loveUIStackViewsbtw. I’m using them all the time! (More about that in a coming article, hopefully) - Then, drag a
UILabeland drop it in theUIStackView. That’s your title, you can style it as you want (Bold, centered, …) - And finally drag a second Label and drop it in the
UIStackView, right below the title.
Set the number of lines of the UILabels to 0 to enable multiline.
Set the class to TextCell and resolve the warnings or errors.
In the class, create a titleLabel and a textLabel variable and connect them to the labels in the Storyboard. And copy the code below in the class.
class TextCell: UICollectionViewCell {

    @IBOutlet weak var titleLabel: UILabel!
    @IBOutlet weak var textLabel: UILabel!


    override func awakeFromNib() {
        backgroundColor = UIColor.whiteColor()
    }


    override func preferredLayoutAttributesFittingAttributes(layoutAttributes: UICollectionViewLayoutAttributes) -> UICollectionViewLayoutAttributes {

        let attr = layoutAttributes.copy() as! UICollectionViewLayoutAttributes

        self.setNeedsLayout()
        self.layoutIfNeeded()

        let desiredHeight: CGFloat = self.contentView.systemLayoutSizeFittingSize(UILayoutFittingCompressedSize).height
        attr.frame.size.height = desiredHeight
        self.frame = attr.frame  // Do NOT forget to set the frame or the layout won't get it !!!

        return attr
    }

}
Beautiful!
Section 3:
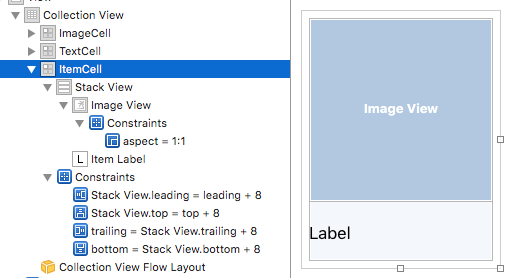
Let’s do the last one, shall we? You know how to create a UICollectionViewCell, name it ItemCell.
Add a UIStackView just like before.
Then add an UIImageView to the UIStackView. Resize it to a square and add an Aspect Ratio constraint.
And add a UILabel below the image, as we did for the TextCell.
Don’t forget to set the class to ItemCell.
In the class, create a imageView and an itemLabel variables and connect them to the Storyboard.
class ItemCell: UICollectionViewCell {

    @IBOutlet weak var imageView: UIImageView!
    @IBOutlet weak var itemLabel: UILabel!

    override func awakeFromNib() {
        setBorder(UIColor.redColor())
    }

}
Wonderful, we’re nearly there!
MyCollectionView
Bear with me, 2 more minutes, and we’re done for part 1!
Open the MyCollectionView class and follow the instructions:
- If you have created a
UIViewController, addUICollectionViewDataSourceandUICollectionViewDelegate.
IfMyCollectionViewis aUICollectionView, skip this step. - Create the sections variables
- Add the following code for the
UICollectionViewDataSource. - Congrats! Job done! Run and see what happens…
class MyCollectionView: UIViewController, UICollectionViewDataSource, UICollectionViewDelegate {


    @IBOutlet var collectionView: UICollectionView!

    let sectionImage = 0
    let sectionText = 1
    let sectionItem = 2

// [...]

}
// MARK: - UICollectionViewDataSource
func numberOfSectionsInCollectionView(collectionView: UICollectionView) -> Int {
return 3
}
func collectionView(collectionView: UICollectionView, numberOfItemsInSection section: Int) -> Int {
if (section == sectionItem) {
return 10
}
return 1
}
func collectionView(collectionView: UICollectionView, cellForItemAtIndexPath indexPath: NSIndexPath) -> UICollectionViewCell {
if (indexPath.section == sectionImage) {
let cell = collectionView.dequeueReusableCellWithReuseIdentifier("ImageCell", forIndexPath: indexPath) as! ImageCell
cell.imageView.image = UIImage(named: "InstaCat")
return cell
} else if (indexPath.section == sectionText) {
let cell = collectionView.dequeueReusableCellWithReuseIdentifier("TextCell", forIndexPath: indexPath) as! TextCell
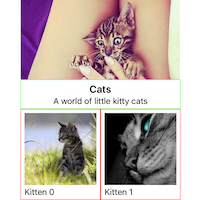
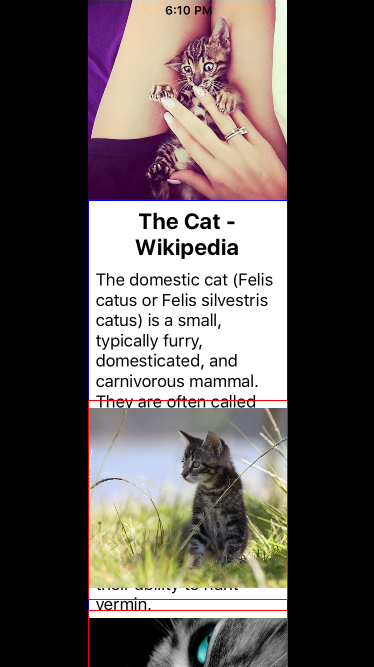
cell.titleLabel.text = "The Cat - Wikipedia"
cell.textLabel.text = "The domestic cat (Felis catus or Felis silvestris catus) is a small, typically furry, domesticated, and carnivorous mammal. They are often called house cats when kept as indoor pets or simply cats when there is no need to distinguish them from other felids and felines. Cats are often valued by humans for companionship and their ability to hunt vermin. \n\nCats are similar in anatomy to the other felids, with strong, flexible bodies, quick reflexes, sharp retractable claws, and teeth adapted to killing small prey. Cat senses fit a crepuscular and predatory ecological niche. Cats can hear sounds too faint or too high in frequency for human ears, such as those made by mice and other small animals. They can see in near darkness. Like most other mammals, cats have poorer color vision and a better sense of smell than humans. \n\nDespite being solitary hunters, cats are a social species and cat communication includes the use of a variety of vocalizations (mewing, purring, trilling, hissing, growling, and grunting), as well as cat pheromones and types of cat-specific body language."
cell.setBorder(UIColor.blueColor())
return cell
} else if (indexPath.section == sectionItem) {
let cell = collectionView.dequeueReusableCellWithReuseIdentifier("ItemCell", forIndexPath: indexPath) as! ItemCell
cell.imageView.image = UIImage(named: "InstaCat")
cell.itemLabel.text = "Kitten \(indexPath.item)"
cell.setBorder(UIColor.redColor())
return cell
}
return UICollectionViewCell()
}
Meh… You have a UICollectionView with cells, but why does it look like that?
Well we talked about using a custom layout so you didn’t expect it to work by magic, didn’t you?
Speaking of the devil, we will tackle the custom UICollectionViewFlowLayout in Part 2 of this tutorial if you don’t mind. In the meantime, you can have a look at the GitHub project if you want: SCCollectionViewCustomLayout ;)
Stay tuned!
Can you upload the code for this part? I followed through the tutorial but the code did not work…
Hey Han,
Sort for the late reply, l’ll have a look at that asap. Did you have a look at the code on GitHub? It was working fine last time I uploaded it.